

Lengro’s Beauty Box
How to Get Fluffy Brows
By Tatiana Mandos

Slim brows are a thing of the past. Full, textured, and fluffy brows are the new thing! And so that’s what we’re going to be looking at today.
I’m here to help guide you through how to achieve this new brow look!
I think we can all agree that fluffy brows are on everyone’s minds at the moment – we see it all over our social media, on our favourite celebs and Influencers. However, unfortunately for most of us, they’re not on our face! Mastering the art of the fluffy brow is a tricky task, but, practice makes perfect!
The biggest reason for it being a bit tricky is because every brow needs something different to create the full, thick hairs that we desire. We need to bear in mind that all eyebrows come in many different shapes and sizes.
So, here are a few things you are going to need to create those gorgeous eyebrows. Grab your spoolie, an angled brush, and a bar of soap or a gel like got2b Glued (which is what I use to create my fluffy brows), and let’s get straight into it!
Step 1: Mapping Your Brow Shape
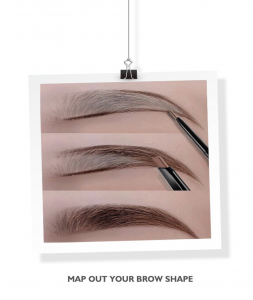
Mapping your eyebrow shape is a vital step in achieving the fluffy brow look – or any brow look in-fact.
Firstly, you are going to start off by creating your basic shape with a fine brow pencil or by using your angled brush with an eyebrow pomade/powder.
Let’s begin mapping out our brows! The start of your brow should be in line with the side of your nose, the arch of your brows should be on the line from the tip of your nose through your pupil and the endpoint on the line from the edge of your nose and the corner of your eye.
Step 2: Brush Up Your Brows
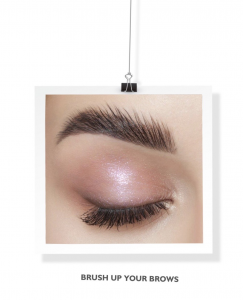
Using your spoolie, start brushing your brow hairs in an upward motion. Once you hit the arch of your brow, start brushing on an outward-facing slant, rather than straight up as it might look a bit too fluffy. The spoolie will help blend out any clumps of product from earlier and give you a natural blur.
Step 3: Fill & Add Hair Strokes
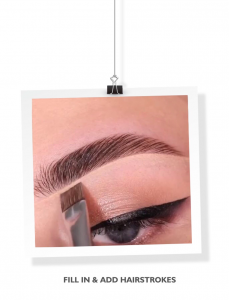
Pick up the product on your brush and start to fill in sparse areas using light pressure. Always bear in mind that it’s easier to add more product than remove it. Be sure to follow your natural arch pattern and create feather-like strokes throughout for a higher, thicker brow.
Step 4: Conceal & Highlight
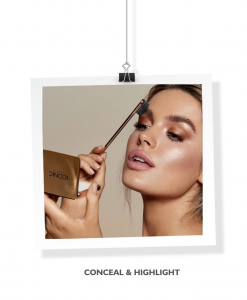
For this next step, let’s pick your favourite highlighter or concealer to clean up any stray marks or mistakes and define your brow shape! If you’d rather opt for a concealer, I’d highly recommend using a thin, flat brush to apply coverage along the base of your eyebrow to help emphasize your brow bone and make it pop! To finish off with a little sass, add some highlighter under your arch.
I hope that this article helped you to create your gorgeous full and fluffy eyebrows! Remember, practice makes perfect!
You can find me on all of my social media platforms from here.
Tatiana xx